

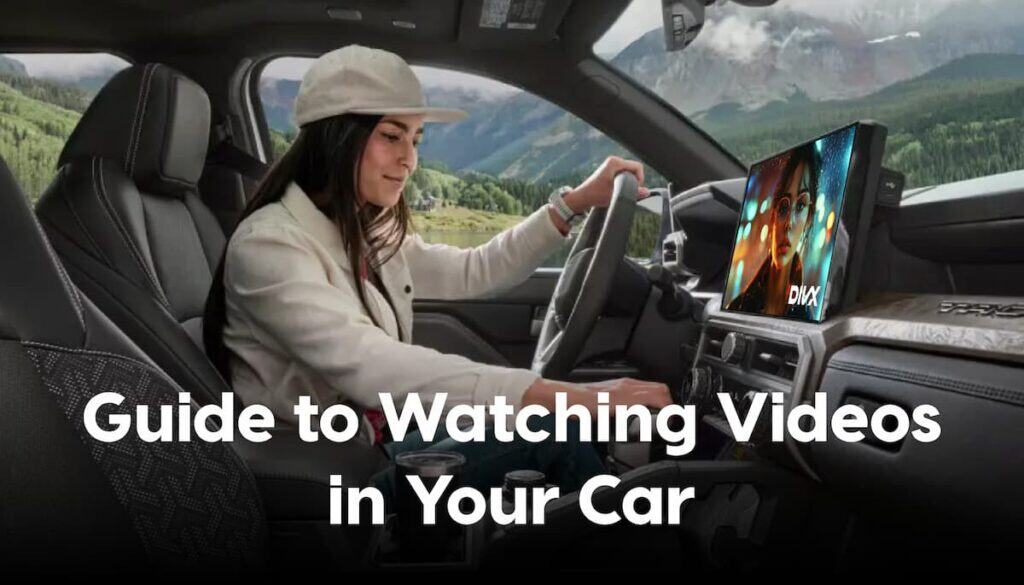
You did everything right. You copied some videos to a USB drive, plugged it into your car’s entertainment system, and got… a loading screen that goes nowhere. Or a folder full of files your car refuses to acknowledge. Or, the classic, a file that plays the first two seconds and then quietly gives up.
Your files aren’t broken. Your car isn’t broken. The problem is that nobody told you the two of them speak slightly different languages, and a little translation work upfront makes all the difference.
We’ve been solving cross-device video compatibility problems for over 25 years. With more than 1.5 billion DivX Software downloads and 2 billion DivX Certified devices shipped worldwide – including in-car entertainment systems – we know exactly where this breaks down. And more importantly, we know how to fix it.
This guide gives you the full picture: what your car actually needs, how to prepare your library for it, and how to build a setup that works every time you hit the road. (Additionally, you can watch a short video on how to convert video for in-car playback.)

Quick Start: Already Know What You’re Doing?
Already know your way around video formats and USB drives? Here’s the short version.
- Check your car system’s owner manual or head unit specs for supported video formats and codecs.
- Download and install DivX Software (free) on your computer.
- Go to the Converter tab within DivX Software. Use the Home Theater profile for DivX Certified vehicles. For everything else, convert to MP4 with H.264 video and AAC audio.
- Format your USB drive to FAT32 for widest compatibility, or exFAT if your car system supports it and your files exceed 4GB.
- Copy your organized video files to the USB drive. Keep folder structure simple, two levels deep at most.
- Test playback in the car with a couple of files before loading the full library.
If any of those steps need more context, the full guide below has you covered.
What’s in This Guide
- Why Your Videos Won’t Play in the Car
- What You Need Before You Start
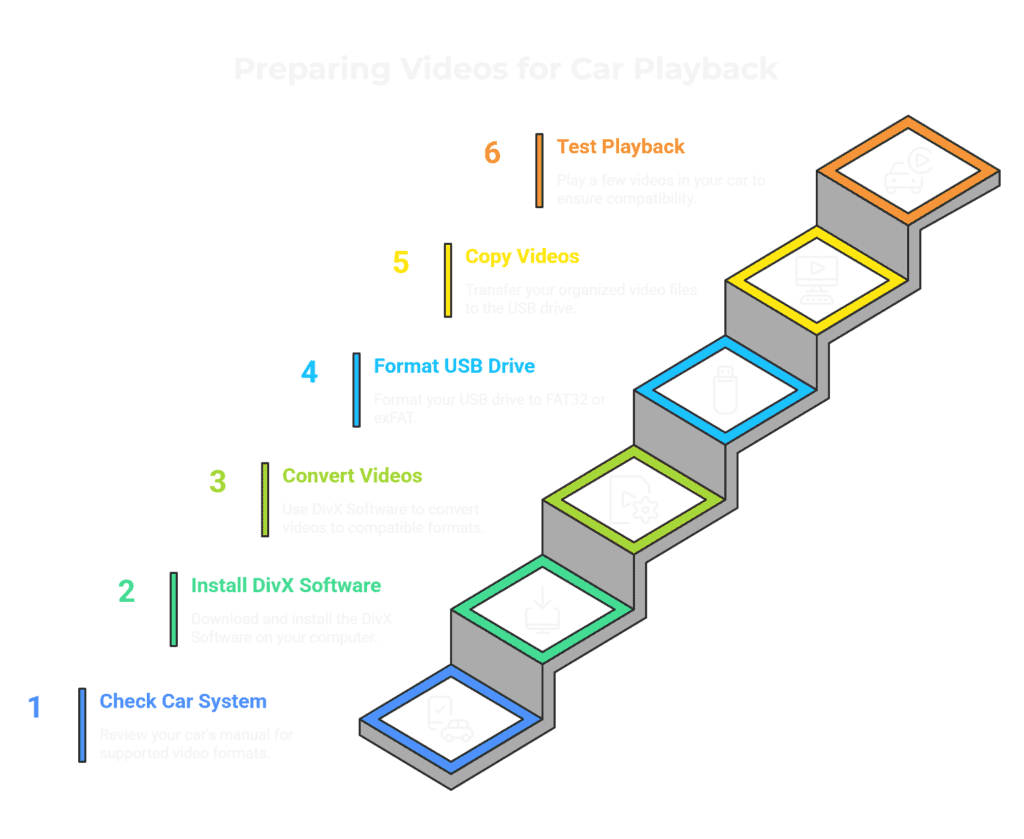
- Step 1: Understand What Your Car System Can Actually Play
- Step 2: Organize Your Video Library for the Car
- Step 3: Convert Your Videos to a Car-Compatible Format
- Step 4: Prepare Your USB Drive
- Step 5: Transfer, Test, and Hit the Road
- Long-Term Library Management
- Advanced Tips for a Better In-Car Video Experience
- Troubleshooting Common In-Car Video Problems
- Frequently Asked Questions
- Your Media Library, Your Rules
Why Your Videos Won’t Play in the Car
You’re not doing anything wrong.
Car entertainment systems are not like laptops or smart TVs. They run on purpose-built hardware with specific requirements around video format, codec, resolution, bitrate, and how the USB drive itself is formatted. A file that plays without a hiccup on your computer might be in a format your car system has never encountered, or sitting on a USB drive it simply refuses to read.
None of that is obvious when you’re loading up the drive at home. And the car system won’t tell you why it’s failing. It just won’t play.
The good news is that this is a preparation problem, not a technology problem. Once you know what your car system needs and you set up your library to match, the whole thing clicks into place. That’s exactly what the steps ahead are for.
Want a deeper look at why specific formats fail? Here’s our full breakdown.
What You Need Before You Start
Before you touch a single file, take two minutes to get these four things in place. It makes everything that follows faster and smoother.
1. Your car system’s owner manual or spec sheet.
This tells you exactly which video formats, codecs, and USB requirements your system supports. If you don’t have the physical manual, the manufacturer’s website will have it. A quick search for your head unit brand and model number gets you there.
2. DivX Software installed on your computer.
It’s free, and it handles everything you need in one place: converting your files, playing them back, and preparing them for your car.
Download free DivX Software before you start.
3. A USB drive, at least 16GB.
Bigger is better if you’re building a full library.
4. Your video library is accessible on your computer.
Wherever your files live, make sure you can reach them. An external hard drive works fine as a source.
Plan for 30 to 60 minutes to get through the full setup, plus however long batch conversion takes depending on the size of your library. The conversion itself runs in the background.
Not sure what DivX in-car players can do beyond the basics? Here’s a full look at its features.
Pre-Flight Checklist
Before you move to Step 1, confirm you have:
- Car system owner manual or spec sheet on hand
- DivX Software downloaded and installed (free at divx.com)
- USB drive ready, at least 16GB recommended
- Video library accessible on your computer
- 30 to 60 minutes set aside for setup (plus conversion time)
Step 1: Understand What Your Car System Can Actually Play
Estimated time: 5–10 minutes
Before you convert a single file, confirm what your car system supports. This avoids wasted time and troubleshooting later.
How to Find Your Car System’s Format Support
- Check your vehicle owner’s manual under the USB or Media section
- If you don’t have a physical copy, download the PDF from the manufacturer’s website
- Still stuck? Search your head unit brand + model number + “supported video formats”
What to Look For
Write these down, you’ll use them in later steps:
- Supported video formats and codecs
- Maximum resolution
- Most systems perform best at 480p or 720p
- USB drive format requirements (e.g., FAT32, exFAT)
What “DivX Certified” Means
Check if your car has the DivX Certified logo (on the unit, in the manual, or on the manufacturer’s site). DivX Certified technology is actively licensed by chip and device manufacturers worldwide, so the setup is simpler:
- The system is tested to reliably play DivX video files
- Use the DivX Home Theater profile in DivX Converter
- No need to guess or tweak settings
If your car isn’t DivX Certified, no problem. The steps ahead work for any system.
Step 2: Organize Your Video Library for the Car
Estimated time: 10 to 15 minutes
Think of your car library as a packed bag for the trip, not your entire wardrobe. A dedicated, well-organized folder makes everything that follows faster and cleaner.
Create a “Car Library” folder on your computer.
Keep it separate from your main video collection. This is your car-optimized copy, built specifically for the road. Your original files stay exactly where they are.
Use clean, simple file names.
Skip the special characters, symbols, and long text strings. Short and descriptive is the goal.
Group content into subfolders by type.
A simple structure goes a long way:
USB Drive
├── Movies
├── TV Shows
├── Kids
└── Road Trip
Keep the folder structure shallow.
The deeper your folders, the harder it gets for some car systems to navigate them. Simple and flat is always the safer choice.
Your Car Library folder is now ready to receive your converted files in Step 3.
Step 3: Convert Your Videos to a Car-Compatible Format
Estimated time: 10 minutes to set up; batch conversion runs in the background
This is where the preparation pays off. Armed with your car system’s specs from Step 1, you’re not guessing at settings. You’re converting with a target in mind.
Start the Conversion
- Open DivX Converter (a tab within the free DivX Software suite)
- Drag and drop your video files
- Choose the right conversion path based on your system
Choose the Right Format
If your system is DivX Certified:
- Select Home Theater profile
- Optimized specifically for certified in-car playback
- No manual tweaking needed
If your system is NOT DivX Certified:
- Convert to MP4 (H.264 video + AAC audio)
- This gives you the widest compatibility across modern car systems
Batch Convert Everything
- Load your full library at once
- Run a single batch conversion
- Let it process in the background
Key Settings to Get Right
Resolution
- Match your system’s max supported resolution
- Most cars perform best at 480p or 720p
- Higher resolution doesn’t improve playback if your system can’t display it
Bitrate
- Aim for 2–5 Mbps at 720p
- Lower bitrate = smaller files + smoother playback on older systems
Audio
- Use AAC or MP3 for maximum compatibility
Output Location
- Set your output folder to your Car Library (from Step 2)
- Keeps everything organized and ready for transfer
Format Compatibility at a Glance
| Format | Compatibility | Notes |
|---|---|---|
| DivX | Excellent (DivX Certified only) | Tested and guaranteed on certified systems |
| MP4 (H.264) | Very good | Best all-around option for most systems |
| AVI | Good | Widely supported, but larger file sizes |
| MKV | Variable | Convert to MP4 or DivX for reliability |
| HEVC / H.265 | Limited (older systems) | Use H.264 instead for safety |
Need a full breakdown of format support across car systems? See our format compatibility guide.
Step 4: Prepare Your USB Drive
Estimated time: 5 minutes
Before you load a single file, make sure the drive is formatted correctly. This is the second most common reason videos fail in the car.
Format your USB drive first.
- On Windows: open File Explorer, right-click the drive, and select Format.
- On Mac: open Disk Utility, select the drive, and click Erase.
[VISUAL CUE: USB Formatting Quick-Reference Table]
| USB Format | Compatibility | Max File Size | Best For |
|---|---|---|---|
| FAT32 | Universal | 4GB per file | Older car systems, safest choice |
| exFAT | Most modern systems | No limit | Newer systems, large video files |
| NTFS | Limited | No limit | Not recommended for car use |
When in doubt, FAT32 is the safe choice. If your converted files exceed 4GB and your car system supports exFAT, use that instead. Refer to the spec sheet you pulled in Step 1.
Test before you load everything.
Copy a couple of files onto the drive and confirm playback in the car before transferring your full library.
Step 5: Transfer, Test, and Hit the Road
Estimated time: 10 to 15 minutes
You’re almost there. Copy your Car Library folder to the formatted USB drive, eject the drive safely from your computer, and take it to the car.
Before you load up for the trip, test playback first. Play one file from each subfolder. Confirm the system reads the drive, finds the files, and plays them cleanly. A few minutes of testing at home saves a lot of frustration on the road.
If something doesn’t appear or play, check four things: USB formatting, folder depth, file name, and codec. DivX Converter’s profile selection resolves most of these.
Once everything plays the way it should, you’re done. Your library is organized, converted, and road-trip ready. The same USB works in any compatible vehicle, so it travels with you.
Pre-Trip Confirmation Checklist
Before you go:
- Files converted to a compatible format using DivX Converter
- USB drive formatted correctly (FAT32 or exFAT)
- Folder structure clean and shallow
- Playback tested in the car
- Master copies backed up on your computer
Long-Term Library Management: Keep Your Car Media Collection Fresh
The setup is done. Here’s how to keep it working well over time.
Keep your originals and your car-optimized copies separate.
Your Car Library folder on your computer is a working copy, not an archive. Your original files stay untouched in their own location.
Run new content through DivX Converter before adding it to the USB.
Same process, same profile you used in Step 3. Consistency is what keeps your library reliable.
Audit the USB drive periodically.
Remove content you’ve already watched. Add new favorites. A fresh, curated library is more enjoyable than a drive packed with files you’ve long since forgotten.
Keep DivX Software updated.
Free updates maintain support for new formats and improvements as they emerge, so your workflow stays current without you having to think about it.
When you upgrade vehicles, check the new system’s specs the same way you did in Step 1.
If the new car is DivX Certified, your conversion workflow carries over without any changes. Same process, new car, same results.
Advanced Tips for a Better In-Car Video Experience
The five steps get your library working. These tips make it work better.
Create separate quality profiles for different screens.
If your car has both a main display and headrest monitors, they likely have different resolution capabilities. A lower-resolution, smaller-file version works well for headrest screens. Save the higher-quality version for the primary display. DivX Converter makes it easy to run the same file through two different profiles.
Use your folder structure as a navigation menu.
Many car systems don’t have a search function, so the way you name and organize your folders is how you’ll find content while parked. Clear, descriptive folder names save a lot of scrolling.
For international content, check multi-audio and subtitle support before converting.
Not every car system handles multiple audio tracks or subtitle files the same way. Check your system’s specs first. DivX Software supports multiple audio tracks and subtitle files natively, so if your system can handle them, you’re covered.
Keep a rotating Road Trip folder.
A curated selection of favorites, always preloaded and ready to go. Update it before each trip rather than digging through the full library on the road.
Consider a second USB drive.
A dedicated kids library on a separate drive is a simple way to keep content organized and hand off entertainment duty to the back seat without touching your main library.
Upgrade to DivX Pro – Unlock Advanced Features
Troubleshooting Common In-Car Video Problems
Something not working? Start here.
My video files do not appear on the car screen
Check the USB drive formatting first. FAT32 or exFAT are your options. If the drive is formatted as NTFS, the car system will likely ignore it entirely.
Check your folder depth. Keep it to two levels at most.
Check the file name. Remove any special characters and shorten anything unusually long.
If none of that resolves it, try a different USB port on the car unit. Some head units are particular about which port they read from.
The video plays but there is no sound
The audio codec is most likely the issue. AAC and MP3 have the broadest compatibility across car systems. Re-convert the file using DivX Converter and confirm the audio output is set to one of those two.
Also check whether your car system has a separate audio setting for USB playback. Some units do, and it’s easy to miss.
Video stutters or freezes during playback
The bitrate is likely too high for your car system to handle smoothly. Re-convert at a lower resolution (480p or 720p) and aim for a bitrate in the 2 to 4 Mbps range. On DivX Certified systems, the Home Theater profile in DivX Converter is specifically optimized to prevent this.
Only some files play and others do not
A mixed-format library is almost always the cause. Files converted at different times, with different settings or different tools, behave inconsistently. Run everything through DivX Converter using the same profile to standardize the library. For files that fail individually, check for corruption by attempting playback on your computer first.
If the problem persists, visit the DivX Support Center for step-by-step troubleshooting.
Frequently Asked Questions About In-Car Video Playback
What video format works best for car USB playback?
MP4 with H.264 is the broadest choice for most modern car systems. If your car is DivX Certified, DivX format is the tested, guaranteed path. When in doubt, MP4 with H.264 is the safe default.
Does my car need to be DivX Certified to use this guide?
No. The format and conversion guidance in this guide applies to any car entertainment system. DivX Certified vehicles offer the most reliable, tested compatibility with DivX video files, but the workflow works regardless of what system you have.
How do I know if my car is DivX Certified?
Check your vehicle owner’s manual, the head unit’s spec sheet, or look for the DivX Certified logo on the unit itself or the car manufacturer’s website.
Can I play MKV files in my car?
MKV support varies widely across car systems. Many do not support it natively. Converting MKV files to MP4 or DivX format using DivX Converter ensures reliable playback regardless of your system.
What is the best USB format for car video playback?
FAT32 is the most universally compatible option and works across virtually all car systems. exFAT is supported by most modern systems and removes the 4GB per file limit. Check your car system’s manual to confirm which is recommended for your specific unit.
Can I watch videos while driving?
In-car video is designed for passenger entertainment. Driver-facing video display while the vehicle is in motion is restricted by most modern car systems and prohibited by law in most jurisdictions. Rear-seat entertainment systems and passenger screens are built specifically for this use.
Your Media Library, Your Rules
Streaming services decide what’s available, when it’s available, and whether it stays available. Your personal video library doesn’t work that way. It’s yours. Curated by you, organized by you, and now ready to travel with you.
No signal required. No subscription needed. No algorithm deciding what plays next.
We’ve been solving cross-device video compatibility for more than 25 years, across billions of certified devices and every generation of in-car entertainment systems. That track record extends beyond consumer software — leading content and technology companies, including The Walt Disney Company, have licensed DivX’s IP to support their own platforms
This guide is built on that foundation. The steps work because the technology behind them has been tested at a scale most people never see.
Your library is ready. Time to hit the road.